
I came across the "Silver Centurion" Iron Man from Wave 5, but I didn't like it that much. I was just a repaint of the Iron Man from Wave 1, which I already have. Plus, most of the ones I saw had less-than-great paint apps. So when I saw the Classic Red/Yellow Iron Man figure from the Iron Man 2 line, I thought that would be a great base for a custom Silver Centurion. Thus started my second custom project.

This sculpt looked perfect for a Silver Centurion custom. However, there was still quit a bit of modding to do to the sculpt. After taking the figure apart (boil & pop), the first part I worked on was the lower abdomen. The upper thighs were extremely difficult to pop off, so be careful if you decide to work with this figure. I modeled the belt area using Super Sculpy, then boiling it to harden the sculpy. Super Sculpy wouldn't always be my modeling medium of choice, but given that I just started customizing, it's easiest to work with and I just happened to have a box of it on hand.

There are many ways to harden sculpy (baking, hot air, boiling...). The baking method isn't suited very well for working with customs, since you'll most likely burn and/or melt your figure in the oven. Using a blow dryer to slowly harden the sculpy is a safer way, and it gives you a bit more control. I don't have a blow dryer, however, so I used the boiling method. I'll have a post later to talk about boiling sculpy in detail.
I then sanded down the circles on either side of his waist to give them a more angular look. As you can see from the picture above, I still need to touch up the paint and fix those pesky paint rub areas. When it's attached, the upper torso rubs against the lower portion, causing some serious paint rub there. Sanding the upper torso should do the trick, but we'll see. Shielding the lower abdomen with a little bit of super glue might help as well. The ball joints on the legs are always the toughest areas to work with on these Iron Man 2 figures. They are not easy to sand down, so a combination of both the shielding and sanding methods are necessary. I really need to get myself a dremel ASAP!
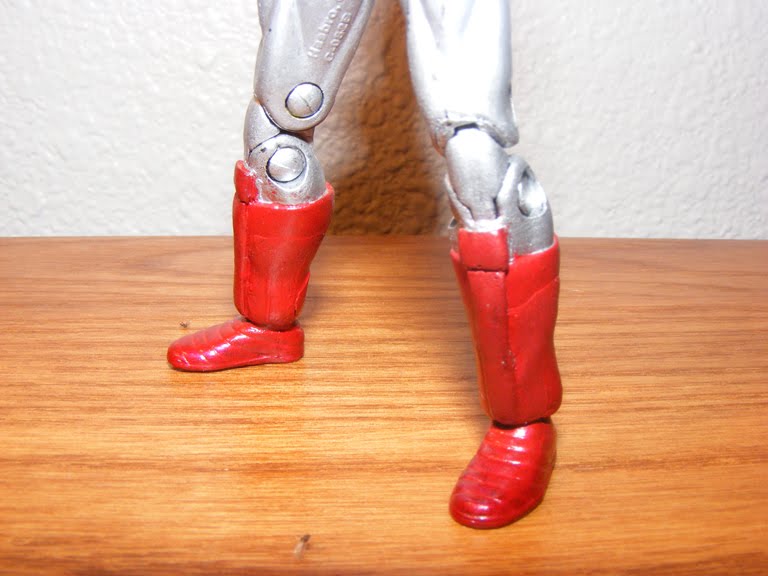
The last thing I did for the lower body was sculpt the boots. These were pretty straight forward. I tried my best to keep the definition of the calves. The boots were done with the same boiled Sculpy method as the belt area.
The rest was just paint application. First, I base-coated the whole figure black. Then, I went over it with the silver paint. After that was cured, I painted the abdomen and boots with the transparent red.
Paints used:
- Games Workshop Chaos Black
- Games Workshop Mithril Silver
- Vallejo Model Color Transparent Red
That's it for this first part. The next part is gonna cover my progress on the head and torso.


